

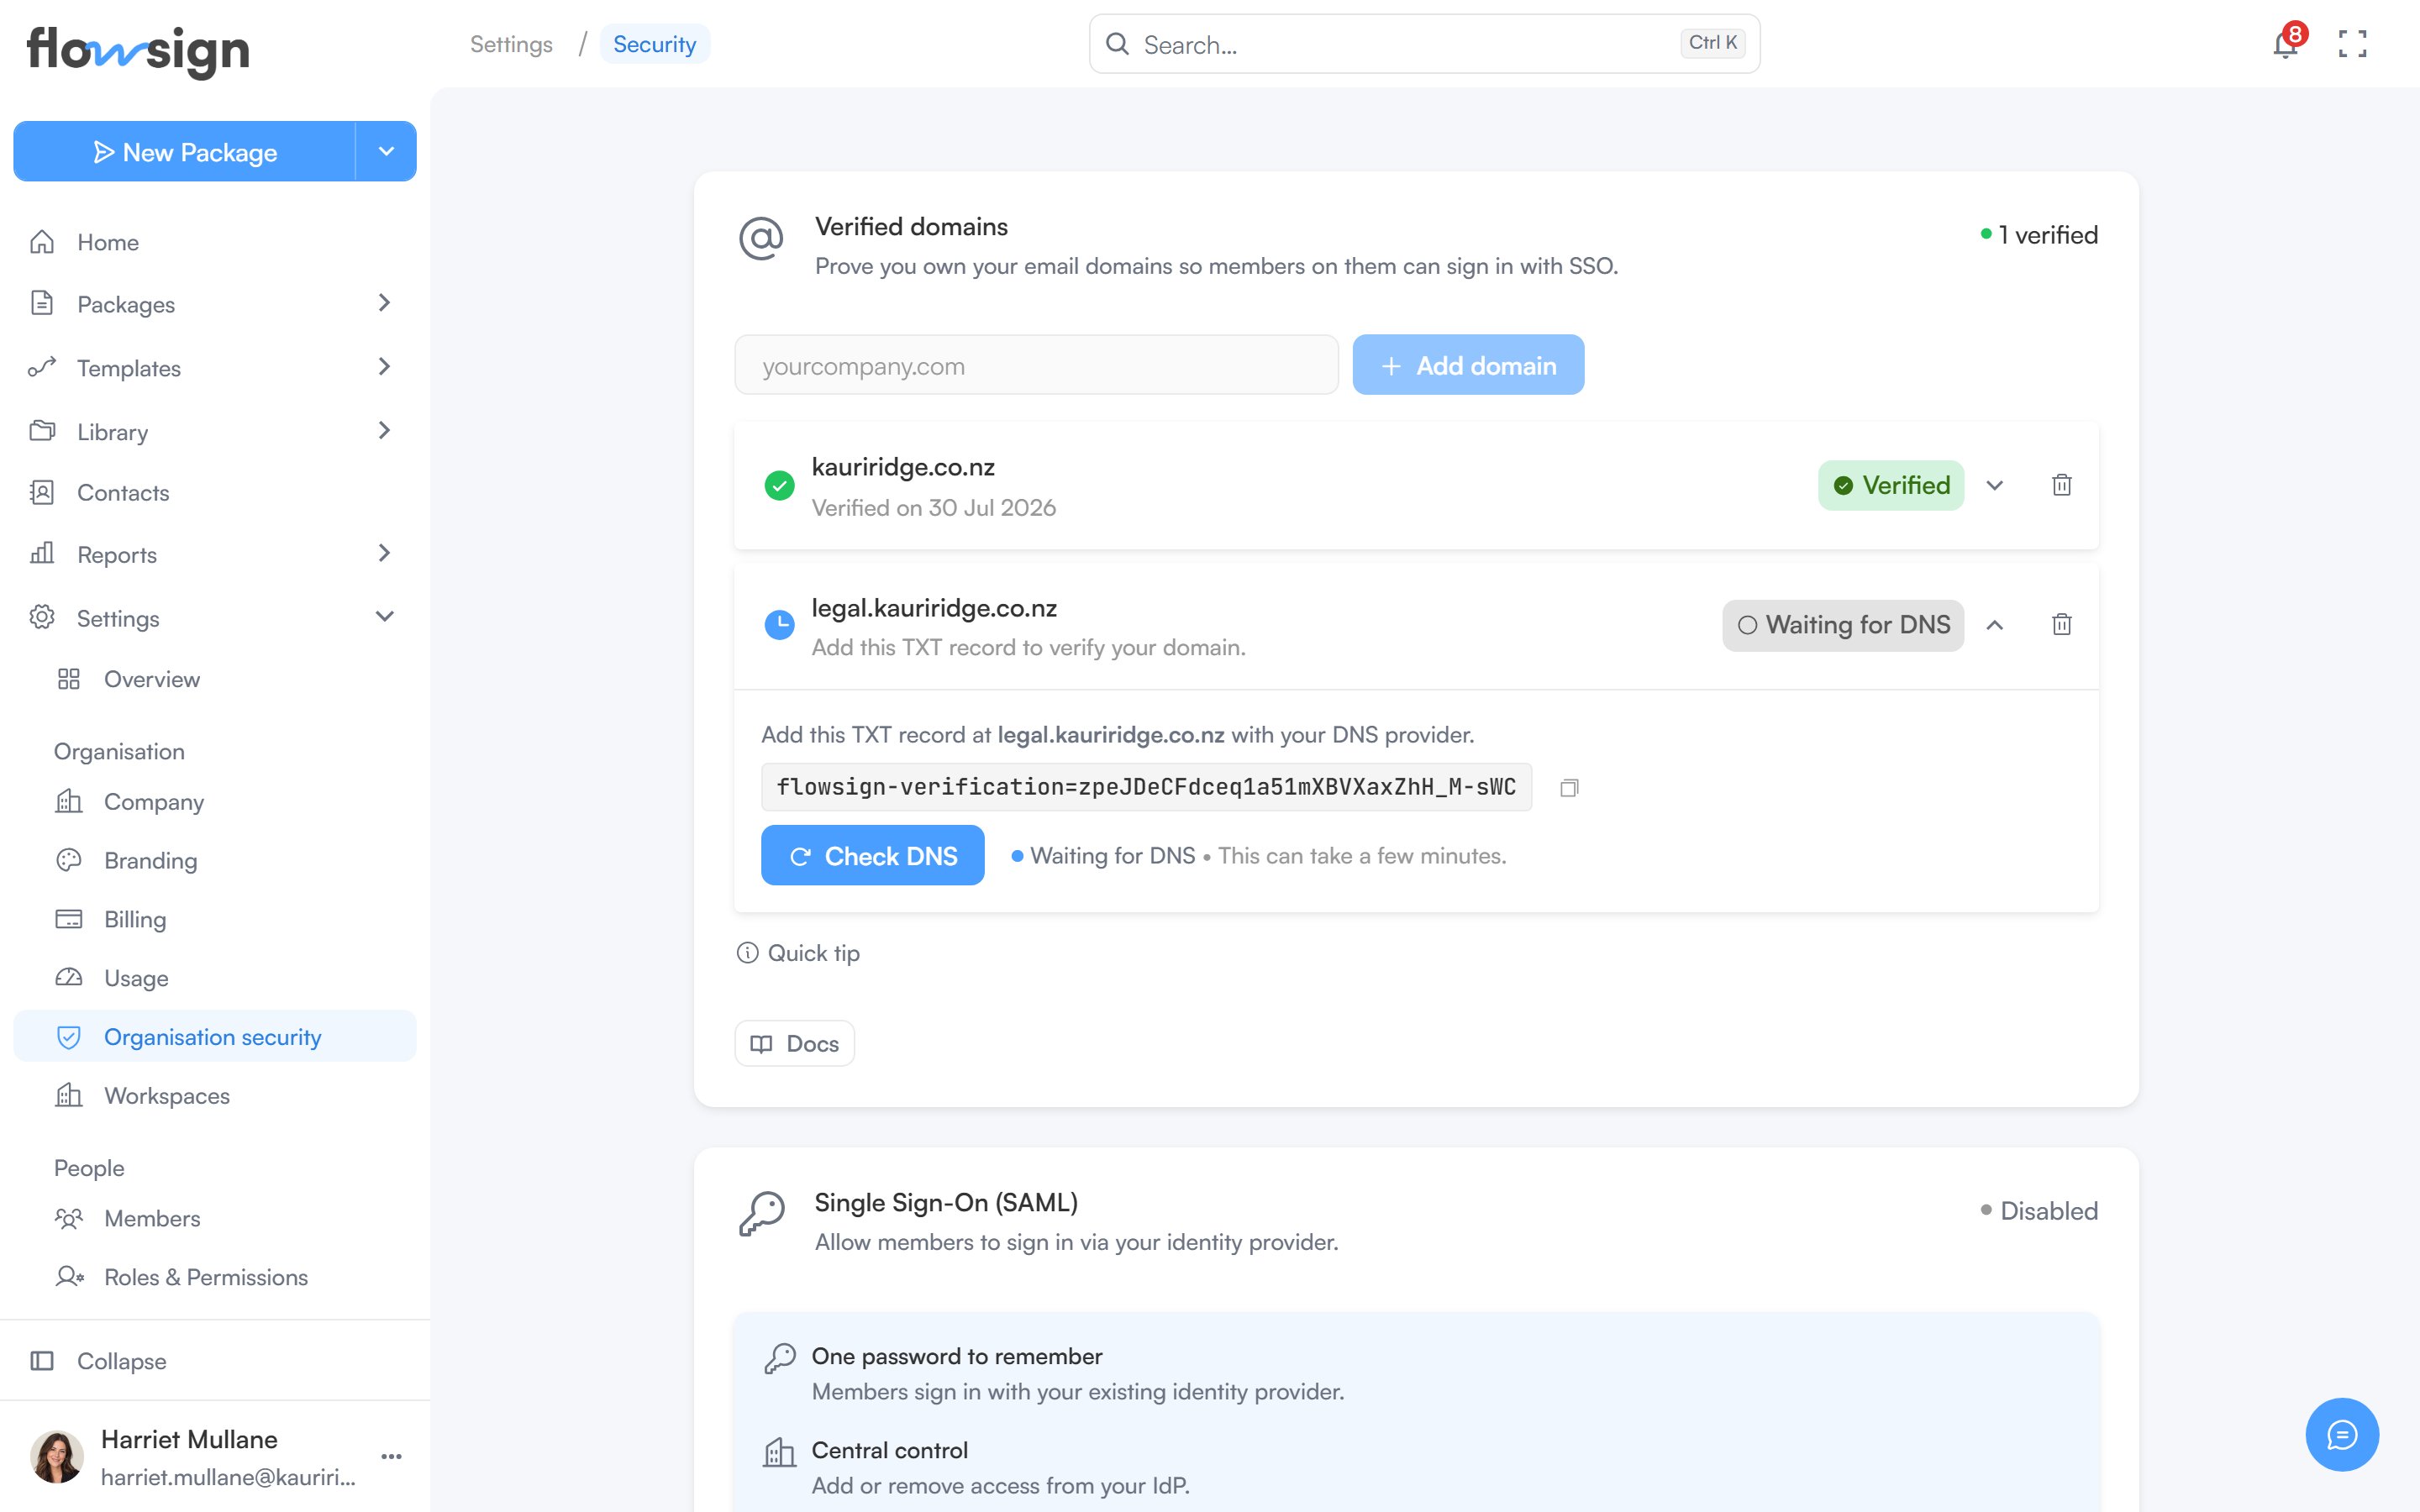
Organisation security, with verified domains, single sign-on, session timeout and the IP allowlist.
Single sign-on
Single sign-on requires the Enterprise plan. On a lower plan the page shows a Single sign-on and provisioning card with an upgrade prompt in place of the three cards described below. Session timeout, IP allowlist and Data retention are available on every plan.Setting up SSO
Only an Owner can change these settings. Keep your identity provider’s admin console open alongside Flowsign, because some values are copied from one to the other.1
Verify your email domain
Under Verified domains, enter your domain in Add an email domain, such as
yourcompany.com, and click Add domain. Flowsign shows a TXT record like flowsign-verification=<token>. Copy it.With your DNS provider, add a new TXT record on the domain itself (host @) with that value, then come back and click Check DNS. While the page is open, Flowsign also checks for the record on its own and the domain shows Waiting for DNS. DNS changes can take a while to appear, so check again later if the record isn’t found straight away. The domain’s chip changes to Verified once it is found. Each domain can be verified by one organisation only.This is the same check Google Workspace, Microsoft 365 and Okta use to prove you own a domain.The email address your identity provider sends for each person must be on a verified domain, otherwise sign-in fails with “No Flowsign organisation is set up for that identity provider.” If your identity provider sends a different address (an alias domain, for example), verify that domain too or change the attribute it sends.Blocks the next step: SSO can’t be turned on until at least one domain is verified. Until then the Enable SAML SSO toggle is disabled and the card says “Verify a domain under Verified domains before turning on SSO.”2
Connect your identity provider (SAML)
Under Single Sign-On (SAML), turn on Enable SAML SSO and paste your identity provider’s metadata URL into IdP metadata URL, then click Save changes. Save changes stays disabled until the metadata URL is filled in. Saving registers your identity provider for your verified domains, listed under Domains using SSO. The card’s status chip says Enabled only once the save has succeeded.The card then shows the ACS URL and the Entity ID / SP metadata URL. Copy both into the SAML app you create for Flowsign in your identity provider, such as Okta or Microsoft Entra ID, and assign the people who should have access.To let members open Flowsign from their app dashboard, create a bookmark app (Okta) or linked app (Entra) pointing at the App tile URL.To switch to a different identity provider later, paste its metadata URL over the old one and save. Flowsign replaces the registered provider for the same domains. If the new URL can’t be registered, the old provider keeps working.Turning Enable SAML SSO off and saving asks you to confirm with Turn off SSO. The IdP metadata URL is cleared and members go back to signing in with their password, so you’ll need to paste the metadata URL again to turn SSO back on.Blocks the next step: you can’t test a sign-in, or connect user provisioning, until SSO is saved on.
3
Test a sign-in
Leave Require SSO off for now. Sign out, enter a work email or your company domain on the sign-in page, and choose Continue with SSO.The first time someone signs in this way, Flowsign adds them as a member of the default workspace with the Viewer profile, and Owners are notified. No invitation is needed. Change their profile under Settings, Members to let them send. If they already have a password account with the same email, SSO is linked to that account rather than creating a second one.Test with a member who isn’t an Owner, or an Owner without two-factor authentication. Owners with two-factor sign in with their password and code, not SSO.Blocks the next step: don’t carry on until a test sign-in has worked. If it fails, check that the email your identity provider sends is on a verified domain.
4
Connect user provisioning (SCIM)
Under User provisioning (SCIM), click Generate token, then paste the SCIM token and the SCIM base URL into your identity provider’s provisioning settings. Generate token is disabled until SSO is saved on, and the card says “Turn on SSO above before connecting user provisioning.”With provisioning on, members are added before they first sign in, their names stay in sync, and removing someone in your identity provider deactivates them in Flowsign straight away. Without it, SSO only adds members when they first sign in, and never removes anyone.
5
Require SSO (optional)
Only turn on Require SSO once a test sign-in has worked. Members on your verified domains must then sign in through your identity provider. Turning it on signs other members out of their current sessions, so let them know first.
Owners can still sign in with their password when Require SSO is on, so you can’t lock yourself out if your identity provider is unavailable.
Provider guides
Verified domains
“Prove you own your email domains so members on them can sign in with SSO.” Add a domain such asyourcompany.com and verify it with a TXT record at your DNS provider. A domain must be verified before SSO can be turned on. Removing a domain means members on it can no longer sign in with SSO.
Single Sign-On (SAML)
“Allow members to sign in via your identity provider.” Enable SAML SSO routes sign-ins for your verified domains through your identity provider using SAML 2.0. Require SSO goes a step further: members on your verified domains must sign in through your identity provider. Owners can still use their password.User provisioning (SCIM)
“Let your identity provider add, update and deactivate members automatically.” Generate a SCIM token and paste it into your identity provider. The token is shown once, so copy it straight away. Members it adds join the default workspace with the Viewer profile, and take up a seat on your plan. If your plan has no seats left, your identity provider can’t add the member. Owners are notified when your identity provider adds or deactivates a member. Rotate token stops the current one immediately, and provisioning pauses until the new token is in your identity provider. Revoke stops provisioning altogether. Existing members are not affected, and you can generate a new token at any time.Session timeout
“Sign members out after a period of inactivity, and after a maximum session length.” Set an Inactivity timeout (from 15 minutes to 24 hours, or No limit), a Maximum session length (from 1 hour to 7 days), or both. Left on the default, a session lasts 7 days, or 12 hours when Require SSO is on. Click Save changes to apply them.IP allowlist
“Only allow sign-in and API access from the networks you list.” Under Add an address or range, enter an IPv4 address, a CIDR range such as203.0.113.0/24, or an IPv6 address.
The list applies to every member, every API key and user provisioning as soon as it is saved, so Flowsign asks you to confirm that the first address you add is the network you are on right now. Removing an address cuts off anyone on it once you save. Removing every address turns IP restrictions off.